Start Programming Reachy Mini Before You Own One (Ages 8-16)
How to send a real robot commands for free in a browser, no account or hardware needed
What matters today
How to send a real robot commands for free in a browser, no account or hardware needed
Key points
- Step 1: Talk to a Real Robot in a Browser, Free, in Under 5 Minutes
- Step 2: Install the Free Simulator and Run the First Notebook
- Step 3: Build One Real Behavior, Not a Toy Demo
- Step 4: What It Costs to Keep Going With a Real Robot
- Action Steps Summary
What You'll Learn
- How to send a real robot commands for free in a browser, no account or hardware needed
- How to install the free MuJoCo physics simulator and run the same code a $299 robot runs
- The exact small project a kid builds first: making the robot turn its head toward a sound
- What it costs and how long it takes to move from simulation to a physical desktop robot
Most kids who say they are interested in AI spend that interest watching someone else build things. A YouTube video of a robot arm, a TikTok of a chatbot demo, a school assembly about "the future of work." None of it involves the kid typing a single line of code or making a single decision a computer has to obey.
Executives who want their kids doing something different, not watching AI but directing it, now have an unusually low-cost on-ramp. Pollen Robotics and Hugging Face built Reachy Mini, a $299 desktop robot with a camera, four microphones, a speaker, and a motorized head and body, fully controllable in Python. The part most parents miss: a kid can write and run real code against this robot for free, today, on a laptop that is already in the house.
Below is the exact path from zero to a working robot behavior, what it costs at each stage, and how long each stage takes, so a family can decide in the time it takes to read this whether it is worth trying this week.
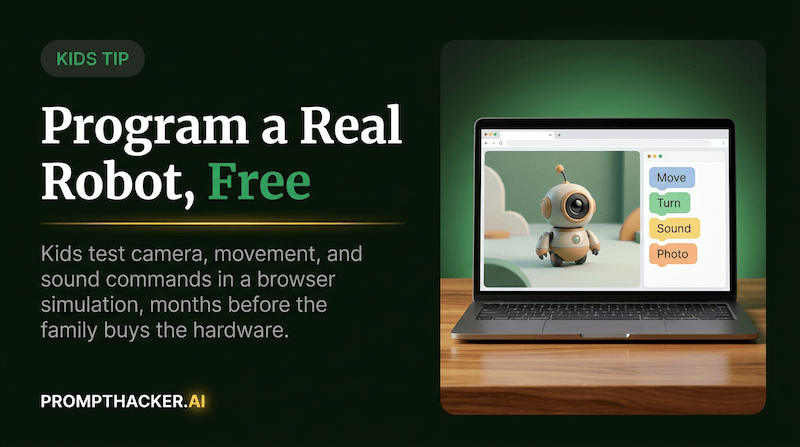
Step 1: Talk to a Real Robot in a Browser, Free, in Under 5 Minutes
Pollen Robotics hosts a free interactive demo on Hugging Face Spaces, a platform that runs small AI apps directly in a browser tab. Open huggingface.co/spaces/pollen-robotics/Reachy_Mini on any laptop or tablet. This connects a kid to a Reachy Mini robot through a webpage, no download and no account required to look around.
A kid can type a plain text command, like asking the robot to look left or wiggle its antennas, or paste a short script. Watching a real machine respond to a typed instruction is proof this is not a demo video someone else recorded. It is a live system responding to input the kid controls.
This step is intentionally shallow. It exists to answer one question before anyone installs anything: does this actually interest the kid? If the answer is yes after five minutes of typing commands, move to Step 2, where the real building starts.
Step 2: Install the Free Simulator and Run the First Notebook
The Hugging Face Space is a demo. The real on-ramp for writing code is Reachy Mini's official simulator, which runs on MuJoCo, a free physics engine originally built by DeepMind and now open source. MuJoCo calculates gravity, momentum, and collisions accurately enough that robotics labs use it to test real robot code before it ever touches hardware. That is the job it does here too.
Here is what installing it actually takes, on a Mac, Windows, or Linux laptop with Python already set up. A parent or older sibling should run this ten-minute setup once, then hand the keyboard over.
pip install "reachy-mini[mujoco]" reachy-mini-daemon --sim
The first line installs the Reachy Mini software along with the MuJoCo simulation engine, using pip, Python's standard package installer. The second line starts a background program called the daemon, which is the piece of software that actually talks to the robot's motors, camera, and microphones, real or simulated. A 3D window opens showing the robot sitting on a virtual desk. Drag with the mouse to rotate the view, scroll to zoom in.
Add the option below and the simulator drops a table with an apple, a croissant, and a rubber duck into the scene, objects the robot's camera can actually look at and detect once code is asking it to.
reachy-mini-daemon --sim --scene minimal
With the simulator running, open the first official tutorial, a Jupyter notebook (a document that mixes explanations with code you run one block at a time) called "Notebook 0: First Connection and Movement," hosted free on GitHub at pollen-robotics/reachy_mini. It walks through connecting to the robot, then moving its head up, down, and side to side, rotating it, and controlling the two antennas. A second notebook, "Notebook 1: Basic Media," covers grabbing a picture from the camera, recording a short audio clip, and playing a sound back through the speaker.
The critical detail for a family deciding whether this is worth the effort: the simulator behaves exactly like a real Reachy Mini connected over USB. Every line of code in both notebooks runs unchanged against the simulated robot today and against a physical one later, if the family buys one. Nothing gets thrown away.
Step 3: Build One Real Behavior, Not a Toy Demo
Running someone else's notebook is guided practice. Building something new is the part that counts as active creation, and Reachy Mini's SDK makes one small project realistic for an 8 to 16 year old in a single sitting: making the robot turn its head toward a sound.
The robot's four microphones can calculate Direction of Arrival, meaning which direction a sound came from, across a 180-degree range in front of the robot. The SDK returns this as a single number: a clap to the robot's left reads close to 0, a clap straight ahead reads close to the midpoint, a clap to the right reads close to the far end of the range. A kid's job is to write a loop that checks this number and moves the head toward wherever the sound came from.
from reachy_mini import ReachyMini from reachy_mini.utils import create_head_pose import numpy as np with ReachyMini(media_backend="default") as mini: mini.media.start_recording() doa, heard_something = mini.media.get_DoA() if heard_something: # doa runs 0 (left) to pi (right); shift it to a head turn turn_angle = (doa - (np.pi / 2)) mini.goto_target( head=create_head_pose(yaw=turn_angle, degrees=False), duration=0.8 ) mini.media.stop_recording()
Clap once near the simulator's microphone (or, on the physical robot later, near its real one) and the head turns toward the clap. That is the whole project: read a sensor, do simple math on the number, send a movement command. It is small enough to finish in an afternoon and real enough that it is the same pattern used in professional robotics: sense, decide, act.
Start recording and read the microphones
The code starts the microphone recording, then calls get_DoA() to pull the Direction of Arrival, the single number the four microphones calculate for where a sound came from.
Check whether a sound was actually heard
The heard_something flag confirms there is a real sound to react to before the robot bothers moving, so it does not turn toward silence.
Do the math to turn a direction into an angle
The doa reading runs from 0 (left) to pi (right), so the code shifts it against the midpoint to get turn_angle, the actual angle the head needs to rotate.
Send the move and stop recording
goto_target() sends the head pose built from that angle over 0.8 seconds, then stop_recording() closes out the microphone session.
A kid who finishes this fast can extend it with the camera instead of the microphones. The camera returns each frame as a grid of numbers representing pixel colors, and a slightly more advanced version of the same loop checks where in that grid a bright color like orange or yellow shows up, then turns the head to keep it centered, the same idea developers have used to build live object-tracking demos for Reachy Mini with tools like TensorFlow. Either version is the same three-step pattern: read a sensor, decide what it means, move.
Step 4: What It Costs to Keep Going With a Real Robot
Everything above costs nothing beyond a laptop the family already owns. If a kid is still asking to build more after a few sessions in simulation, Reachy Mini ships in two versions. The Lite version costs $299 and plugs into a computer over USB, using that computer's processing power. The Wireless version costs $449, includes its own onboard computer and a rechargeable battery, and runs untethered from the desk.
Both ship as a kit that takes 2 to 3 hours to assemble, a project a parent and a kid can reasonably do together in one weekend afternoon. Once built, the robot has 9 total degrees of freedom (independent points of movement), split across three areas:
- 6 degrees of freedom in the head
- 2 degrees of freedom in the antennas
- 1 degree of freedom for full 360-degree body rotation
Every notebook and script written in the free simulator during Steps 2 and 3 runs on this physical robot without changes, because the simulator was built to behave exactly like the real Lite version connected over USB.
That means the $299 to $449 purchase is not a leap of faith. By the time a family considers it, the kid has already proven, for free, that the code works and that the interest is real.
Action Steps Summary
1. Try the free browser demo. Open huggingface.co/spaces/pollen-robotics/Reachy_Mini and send a few text commands, no install required.
2. Install the free simulator. Run pip install "reachy-mini[mujoco]" then reachy-mini-daemon --sim to open the 3D robot view.
3. Work through Notebook 0 and Notebook 1. Both are free Jupyter notebooks on GitHub covering movement, camera, and audio, step by step.
4. Build the sound-tracking behavior. Write the short script that reads the microphone's Direction of Arrival and turns the head toward a clap.
5. Decide on hardware only after simulation. If the interest holds, the $299 Lite or $449 Wireless kit takes 2 to 3 hours to assemble and runs the same code already written.
For Parents and Educators
Core concept: This teaches the sense-decide-act loop that underlies almost every robot and AI agent: a sensor produces a number, code interprets that number, then a motor or action follows. Once a kid understands this pattern with a microphone and a head turn, the same idea explains self-driving cars, smart thermostats, and voice assistants.
Conversation starters: What number did the microphone give you when the sound came from the left versus the right? Why does the code need math on that number before it can move the head? If the robot tracked color instead of sound, what could go wrong if two objects were the same color?
Three deep dives. Four useful moves. One email worth opening.
PromptHacker turns the AI firehose into practical next steps for work, health, family, and everything time keeps trying to steal.